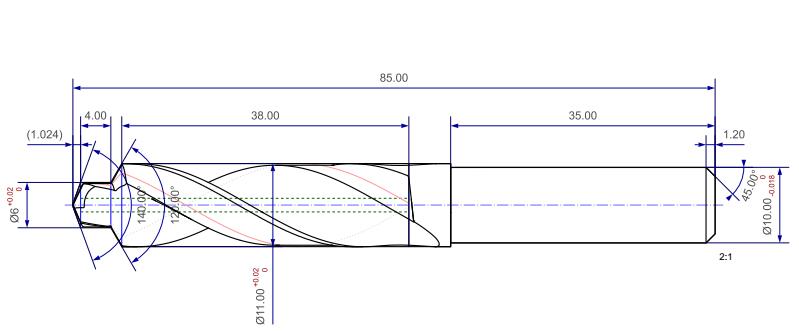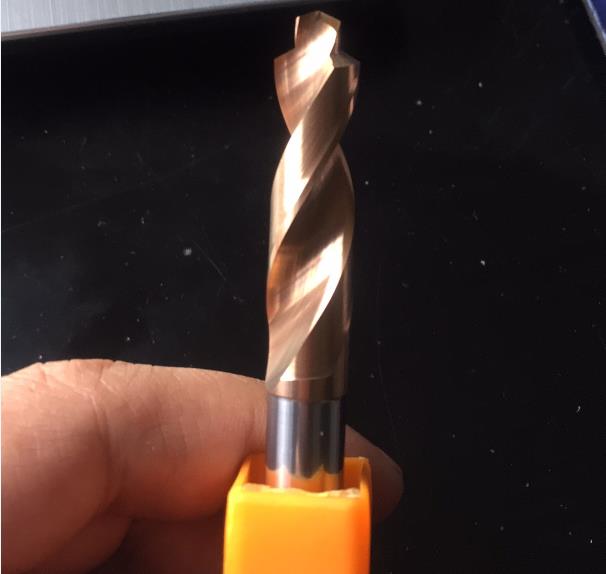
The bench compound drill can combine drilling and reaming into one-time cutting, simplify the machining procedure and improve the machining precision. However, some stepped bit manufactured by some manufacturers can not meet the user's requirements in use, especially for automotive automation production line, the tool is prone to problems, the following on the stepped bit design benchmark selection and process control on the use of performance to do a simple exposition.
The standard form of stepped drill drawings is usually divided into two basic forms: the tapered shank stepped drill based on the axis of the tapered shank and the straight shank stepped drill based on the axis of the large diameter. Both types of bits belong to a single benchmark element, and the selection of the benchmark axis is mainly determined by the working requirements, operating conditions, tool processing and measuring methods.
2 process analysis
1. the process datum datum is the reference object that reflects the direction or position of the measured elements. The datum marked on the drawing is ideal, but the axis is the central element, in fact, does not exist, it depends on the corresponding rotary surface to reflect. Because of the shape error of the actual revolving surface, there must be a shape error in the actual axis. According to the criterion of datum establishment, in order to satisfy the minimum condition, these minimum cylindrical axis should be taken as the datum axis in the actual elements of the datum axis, which is difficult to achieve in actual processing and measurement.
The benchmark of taper shank step drill is based on taper shank axis according to functional requirements. In actual machining and measurement, the process false apex is added to the bit head and the center hole is drilled. The axis is simulated by the center hole at the tail and the center hole at the false apex. After the cutting tool is processed, six products are sampled and their coaxiality is measured. The measured data are shown in Table 1. As can be seen from the values in Table 1, for the same set of products in Table 1, the errors measured with the taper shank as the measuring datum are larger than those measured with the center hole as the measuring datum. The number of measurements is 1 234 566 because the stability of the base mm is increased with the center hole as the measuring datum, thus overcoming the cantilever deflection and measuring the shaft of the taper shank. The error of line reference 0.025 0.030.028 0.020 0.018 0.025 is small. Therefore, in order to ensure the standard 0.015 0.018 0.015 0.015 0.015 0.015 0.016 of product quality center hole, the tolerance value should be reduced properly when the measuring datum is changed from the axis of taper handle to the center hole at both ends. On the one hand, the position error of small diameter datum of straight-shank stepped drill bit does not conform to the actual assembly working conditions, on the other hand, the offset value is also large. The value is related to the length of the measured small diameter and the inclination angle of the measured small diameter axis, as well as the distance between the large diameter and small diameter and the inclination angle of the datum axis. As they increase, they increase irrespective of the length of the reference axis, so this datum form is not reasonable in theory. However, the structure of the straight shank step bit is relatively simple, and the long diameter is the main positioning surface in the assembly working state. Therefore, the large diameter axis as the reference can not only meet the functional requirements, but also be easier to use the simulation reference in the processing and inspection.

dimensional accuracy
The size accuracy of large and small diameters (D, d) has obvious influence on the hole diameter. If the drill diameter exceeds the tolerance, the hole processed must exceed the tolerance. The rough and fine grinding process can be adopted to ensure that the diameter of the drill bit is about the middle difference. The tolerance of the small diameter length L determines the length of the small diameter part. For the stepped bit manufactured according to the national standard, the distance from the D top angle to the D top angle can be converted and measured with a caliper. For the tolerance value within or below, it must be measured with the specific 0.2 dosage. If the length of the small diameter part exceeds the tolerance, the depth of the step hole will be affected, and the normal operation of the automatic production line will be affected seriously.
Position accuracy
Even if the dimension precision of the working part of the bit (D, d) is guaranteed, the diameter of the hole is too large due to the coaxiality error of the datum axis, and the contact height of the threads is not enough after tapping, resulting in the failure of the thread connection. If the angle between the two main cutting edges and the reference axis is unequal or the cutting edge height along the reference axis is unequal, the unequal cutting depth of the two main cutting edges will cause the radial cutting force to be unbalanced, resulting in the hole expansion. The expansion is? D = H TG (?/2) in the form of H - two main cutting edges along the axis of the height difference? The half vertex angle may make the aperture of the machined hole out of order. In order to avoid excessive aperture error, the reference axis should be used as the positioning datum when grinding the bit, and the corresponding fixture should be made to ensure the technological requirements.
Surface quality mainly refers to the condition of drill surface layer, including surface roughness and surface hardness. If the requirements are not met, the tool wear resistance, fatigue strength and corrosion resistance will be affected.
- Customer first|Reputation first|Mutual Benefit|Common Development.
- English


